If you work with wood often, then it is probable that you have a preferred router already. It is a precious piece of equipment that aids you a lot in woodwork projects. However, as perfect as the tool is, it is often difficult to operate and control. They require quite a bit of practice to adequately control them for the particular woodwork.
To ease the learning and aid in its overall function, a router table can work wonders to make the whole process easy.
In the following guide, you will find all basic knowledge of a router table and how you can use it, along with some safety precautions and additional tips.
Contents
- What is a Router Table and Why Do You Need One?
- Types of Router Tables
- Benchtop Router Table
- Floor Standing Router Table
- Extension Wing Router Tables
- How to Fix Router to Router Table?
- Step 1: Acquire the proper plate
- Step 2: Fix the new plate to the router
- Step 3: Mount the unit onto the table
- Step 4: Test your unit
- How to Use a Router Table
- Step 1: Set the router bit and depth
- Step 2: Start routing
- Safety Precautions
- Additional Help to Working With a Router Table
What is a Router Table and Why Do You Need One?
A router table is exactly what it sounds like, it is a wood router that is attached to an efficient woodworking table. It has a vertically placed router on the surface with some other handy features like the fence and guides. These make sure that each cut you make will be accurate.
Generally, these router tables are designed to work and cut large pieces of wood at one time. However, you can use it on your preferred size of workpiece, given that you assemble and use it properly.
It is not important to have a router table to work a router. You can work with a handheld router without feeling the need for a router table.
Nevertheless, it has proven to be faster, easier and much safer to operate a router with a router table. It also allows you to have better control of the appliance when working with the table.
You can use a router table to construct your own mouldings, grooves and slots in each wood piece to make panel doors and such.
Types of Router Tables
There are three types of router tables that you choose from. Your choice depends on the placement of the table and your requirements for the equipment.
Benchtop Router Table
Benchtop tables, much like the name, sit atop a workbench. They are easily foldable, compact and very portable. They do not take up much space in your workroom.
Floor Standing Router Table
When looking for a heavy-duty, larger router table, this is the one to go for. These router tables are much larger and are usually more like proper tables. They take up much room and are not easily moved.
Extension Wing Router Tables
Some router tables can be attached to the extension wing of the table saw. They are great for space-saving. You can easily put them away when not in use.
How to Fix Router to Router Table?
Now that you have a basic understanding of a router and a router table, it is vital that you know how to attach a router to a router table if need be.
Step 1: Acquire the proper plate
First, you will need to acquire the correct size and model of mounting plate for your router. There are different plates for each brand, so you must first check to see if your manufacturers have a plate of their own. If not, any general mounting plate set will work as it has varying mounting holes for difference.
To check if the plate you are required to buy has the correct measurements, you will need to check the router plate previously installed on your router.
If the already installed plate is good for use, remove it and set aside its screws that you will need later as mounting screws.
Step 2: Fix the new plate to the router
When you have a new plate that is compatible with your router, you will need to attach it to the surface of your router. The exact way to do this will differ on the size of the router you occupy.
However, the general method may work. You will need to attach the plate by screwing it to the flat surface of the router. This will permit the router bit to bulge out when operating and still hold the unit steady.
Step 3: Mount the unit onto the table
Once the mounting plate is attached to the router, you have to prepare to mount the unit to the router table. To do that,you must remember to unplug the appliance without fail.
Next, hold the entire unit in a way that the router unit extends in the direction of the bottom of the table. You know you have done this properly when the mounting plate is firmly touching the table and the router bit is pointing upwards.
After this, it is advised to bolt the mounting plate with the formerly removed bolts. This makes sure that the unit holds steady and does not happen to jump due to the occasional harsh movement of the unit when in operation.
Despite the fact, you can also leave it unmounted to allow easy access to router change between workpieces.
Step 4: Test your unit
When the router is properly attached to the table, you will need to plug the unit back in. You will also need to check if there is an in-built power switch on our table for ease of use. It will save you lots of time to be able to control the power of the router right there from the table.
Once all of the steps are complete, you are ready to test out your router table and use it for any of your projects.
How to Use a Router Table
The very first thing to do before using a router table is to don the protective equipment on hand. This includes gloves, goggles and such. In-depth safety precautions are mentioned below.
Read Also: How to use a table saw
After you are fully protected from any possible incidents, you begin your work on the router table.
Step 1: Set the router bit and depth
First, you must adjust your router’s settings. Specifically, you must adjust the depth of the router to harbour your chosen piece of wood. In addition, you will most probably have to change up the router bit depending on the sort of trim or joint you are looking to cut.
Remember to always unplug the router before you go on ahead and change the router bit.
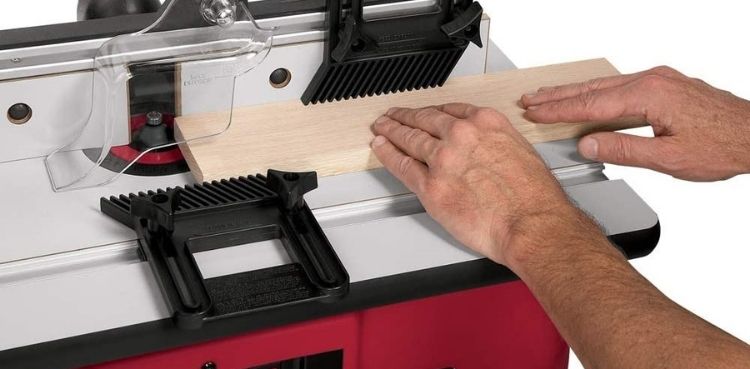
Step 2: Start routing
Once you have adjusted the depth and bit of the router, make sure that the fence and the necessary guides are also set up properly. Once that is done, you can test a small piece of wood to ensure the proper working of the router.
Set the test piece to the side for the moment and start up your router to the highest speed. Use the piece of wood to ensure all the adjustments are correct and the router is working properly.
If something is amiss, you can always pause and change the settings of any and all parts of the router.
Safety Precautions
The safety precaution in the operation of a router will also be applicable to the use of a router table.
Evidently, you must always wear protective equipment when working with any such appliances. Protective equipment includes goggles, work boots, thick gloves, ear protection, and full-sleeved fitted clothes.
In addition, you must ensure to work at normal speeds when working with a router. It is not wise to rush through the process of cutting or shaping wood as it can lead to mistakes or accidents.
You must also be careful not to put pressure on your workpiece as that may weaken it and cause splinters which affects the quality of work.
Moreover, it does not matter what size your workpiece is, you must always steady it with both hands on both ends lest you lose control.
Additional Help to Working With a Router Table
It is important to note that you should never bring your workpiece to the router bit before it has reached its maximum speed. You must do so to make sure that the router makes a clean, accurate cut. The same way, remember to wait for the bit to fully stop before moving your workpiece to make a pass.
It is always beneficial to use the given fence and guides to their fullest capability. These allow you to construct joints that would have been difficult to construct with a standard handheld router.
So there you have it, almost everything you may need to know to use a router table. Despite the fact that the setup of a router table may take a while, it will always be worth it in your woodwork activity. Go on ahead and get routing. Keep in mind the safety precautions and all the instructions for the best experience.